Tuesday, December 24, 2013

Happy Christmas!


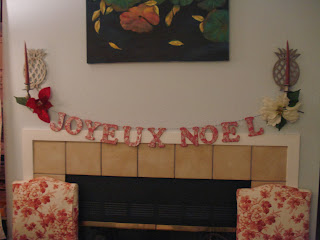
Happy Holidays to all.  Thank you for your patience with the long lag times between postings! I hope that you will return often as I hope to recalibrate my blog to provide the latest on my creative endeavors and inspire you to continue to build your creative lifestyle.

I wish that your holidays have begun with joy and love and will end with a sense of renewal for the coming new year.

Best Wishes!  


Monday, December 9, 2013

Tutorial Mondays: Decorative display letters...Just in time for the holidays


Last year I decided to add to my collection of decorations for the holidays. I had seen in many magazines the trend of using lettering as a decorative detail and wanted to figure out how I could make a set with what I had around the house or at least with minor purchases.  With a little research which included studying different magazine pictures, etc., I came up with a method I thought would work.  And, it did!  I want to share with you how I did this in hopes of giving you the opportunity to try this out as well.

Materials:

  1. Wooden letters (unfinished) - I got mine at Michael's Crafts (last year's project came from Joanne Fabrics).  The letters range from 99 cents to $1.50 a piece.  These were about 1/8 to 1/4" thick. 
  2. Craft acrylic paint - I like the Folk Art brand but other's work as well.  I chose a red.
  3. Embossing powder.  I chose silver.
  4. A rubber stamp with a simple over all pattern.  I chose a 4 sided block of leaf patterns.
  5. Embossing stamp pad (the medium that sets the embossing powders).  I have Hampton Art Stamps variety in a smaller pad and the one shown above by RangerInk, called Tinted Big and Bossy Giant pre-inked Embossing pad.  (Both are acid Free).
  6. Heating tool
  7. Sponge brush and access to water for clean-up.
  8. News paper or a plastic drop to protect your work surface.
  9. Drill for making holes.
  10. Twine - I used a blue and white twisted twine.
  11. Other optional supplies:  Light sandpaper to soften any rough edges (not shown), toothpicks
Step 1:
If you need to sand the letters so they are not rough at the edges, use a light sand paper or emery board and clean the edges.  Mine was acceptable so I didn't bother.  However, you need to drill the holes at the top of the letter to string together on twine later.  For the holes, I used a 3/32" drill bit and made two holes.

Step 2:
Paint the front side and edges of the letter with your acrylic craft paint.  I did a couple of layers, letting each one dry.  Don't forget the edges.  You can opt to do the back but wait till the paint is dry before your turn it over. (Can you spray paint these?  Sure why not, give it a try!  I prefer the acrylic paint).  Remember to keep the holes clear. Use a toothpick to clear the holes of paint if necessary.

Step 3:

(If you have not embossed before, try this on a thick card stock and practice).  

Now use the embossing pad and the rubber stamp:  Press the stamp into the pad, then press the stamp on to the surface of the letter in an overall way.  My stamp was bigger than the letter so I stamped and turned the block and stamped in an empty space and kept going till the letter was covered in an embossing ink pattern. The picture above shows the embossing ink highlighted in the light.

Step 4:  

Over a large piece of paper - paper towel will work or a piece of newspaper - I used an 8.5 x 11 printer paper - place the letter on the sheet.  Sprinkle your silver embossing powder all over. Don't worry about wasting the powder - we will recapture the left overs.

Step 5: 


Pick up the letter carefully so as not to rub off the embossing powder which is temporarily adhered to the embossing powder.  Shake off the excess and even tap an edge to the table over the paper to dislodge any more excess.  The excess embossing powder that was shaken off before heating can be recaptured.  Open the embossing powder container.   Pick up the paper (with the embossing left overs) and tilt the powder back into the container. It may seem tedious but I would do this for each letter.  The powder on the table gets every where and could interfere with your designs on the next letters.

Step 6:
Using the heating tool melt the embossing powder onto the letter. (Warning: Don't put the heating tool too close other wise you will melt the acrylic paint - yep! It will!  Acrylics are a plastic of some type - it will melt, bubble and burn, if you get too close and linger.)  You will know the embossing powder is melted and permanent when it turns from this sandy grey look to the...


shiny metallic look above.  Wait a second or two till it cools, then you can gently touch it without burning yourself.  If it is hard and smooth, its done!  If not apply the heat again.  You will see a visual change in the embossing powders as it transforms to its permanent state - it will bubble, rise and then flatten into a bright color.

Step 7: Once all the letters are done, use your chosen twine, string up the letters so that the twine comes up from the back and goes over the front into the next hole and out the back to the next letter.  

I would say that this took perhaps about 15 to 20 mins total to paint, dry, stamp and emboss the one letter in this tutorial.  The biggest time consumer is the painting and letting it thoroughly dry. If you don't let the paint dry the embossing powder will stick to any moist surface and the design will be smudged and not clean.  

All the materials can be found at arts and crafts stores in your area.  The embossing tools are the more expensive part of the list.  If you do not want to invest in a heating tool you could use a hair dryer on its hottest setting but the force of air might blow off the embossing powder, do a test run on a piece card stock first.

I am sure there are other ways to mount the letters, please share your ideas in the comments for myself to note and other readers eager to try this but do not want to use string.  

As the holidays continue to gather momentum, making fun and pretty decorations has always been a part of the celebratory process for me.  I hope that by sharing this tutorial with you, you will give this a try and add a little bit of sparkle and a heartfelt text message to your family and holiday guests.

Happy Holidays!

Tuesday, December 3, 2013

Tuesday Arts: Week two of Haiku daily practice


Last week's haikus started off as a project in doodling-a-day.  However, with Thanksgiving celebrations I got behind and fell back on my rubber stamp, embossing, inking and watercolors. The black band was simply for Black Friday...which ended up being a day of rest for me.   The reason I wanted to just doodle is I am a teacher during the week.  My students are always doodling.  I remember doing the same in the margins of my papers.  Its a free way to just let the pen flow without expectation.  As I want to free up my practice of so many expectations I have put on myself in the past, the doodling I hope will be a great exercise in setting my creative soul free.  Let loose the wild child.


Sunday, December 1, 2013

Sunday Musings: 1st day of Advent...and counting


Though, today is the first day of December, Autumn still reigns until her elder sister Winter takes over December 21st.  Here in northern California, the days are warm and the nights chilly. Sunrises are foggy and the sunsets flame-on!  The deciduous trees in the area are lemon, mustard and a riot of reds, rust, tangerines and corals.

Inspired by this colorful season and with a desire to improve my creative practice in embroidery and textile painting, I whipped out some muslin and stenciled, using fabric paints, oak leaves and acorns. Out of practice, I used a bit too much water and the paints bled a bit beyond the stencils. I was not waylaid by this and I am working with 'this mistake' (always a learning experience rather than a problem) and using embroidery to outline the leaves and acorns to define them as well as bound the eye within the shapes.

I am not sure what I am doing next with this piece - ah, the joys of experimentation! - but I wish to use various stitches - running, kantha-like or shashiko-like to build the background which is pretty boring...to say the least.  It has been my habit to spring into a project out of fear that I won't do anything.  So during those moments, I plunge in with only the details in mind and not the broader picture. The result is I get stuck with nice image(s) but might not be sure what to do with them to make the composition cohesive and finished.  I tell myself that I need to do is slow down, and think the process through.  And, yet I don't want to lose the spontaneity of the process. Mistakes can become happy resolutions. A shift in ideas is a welcome re-energizer when the project loses its sweetness.  I envy those who can use sketch books to build ideas and go from there as it seems to keep them on track and focused on the outcome they want.  For me, past experience with over planning a project results in my work feeling stiff, and staged and a dull imitation of the original idea.

In any case, with this project I was not actually looking for a specific outcome.  I wanted to play with paints and threads and learn from the experience.   So, we shall see how this evolves over the next few weeks.


"Analysis kills spontaneity.  The grain once ground into flour springs and germinates no more."
 - Henri Frederic Amiel


“Why not seize the pleasure at once? -- How often is happiness destroyed by preparation, foolish preparation!”  - Jane Austen, Emma


Thursday, November 28, 2013

Thursday Crafts: Happy Thanksgiving

Autumn - art quilt 8 x 10
The Autumn dust has settled, and the candles begin to glow.
We gather together to give thanks for all we have.
We think of loved ones who have past on.
Friendships are embraced and renewed.
Love warms and heals us.
Hope kindles our creative powers.
Joy feeds our spirit so that,
Peace settles in our heart and soul for the days to come.

Happy Thanksgiving.

Tuesday, November 26, 2013

Tuesday Arts: A week of Haikus


A art haiku a day - that is my goal.  This project started last week in an effort to keep the hand and creative juices flowing instead of solidifying into a rubbery block of jello.  (I thought this analogy was a bit nicer than referring to my creative procrastination as 'sludge'?)  Like a haiku, I am using a small space to capture a quick idea, or thought or feeling.  This particular set was using collage, embossing and rubber stamps.  Fall was certainly in the air and I built on that theme.

I will  regularly post on Tuesdays any of my artistic endeavors.  This will give me a set deadline for keeping up my project as well as provide my readers with regular features they can come expect. My grand plan is that the haikus will eventually work their way into larger projects and tutorials that I can share with you.

Next up is, Thursday Crafts - I plan to post regularly on Thursdays any projects that are focused on my love of crafting.  With the holidays coming up, I get real excited about making things for gifts and decorating.  But, I also love to craft things for the home that are useful and beautiful as well.  So, stay tuned.  FYI - This Thursday is Thanksgiving Day, so my post may not be craft oriented this time around but expect the following Thursdays to be an arts 'n' craft post.

Saturday, November 9, 2013

Art Everyday Challenge

Leah Piken Kolidas, of Creative Every Day - a wonderful and inspiring bloghttp://creativeeveryday.com/, has kicked off her Art Every Day Month challenge for the year.  I have tried to participate with vigorous intent but usually life got in the way and the initial energy to participate would wax and wane, then peter out entirely.  This year I am using it as a vehicle to proceed on my journey of a creative life that is long overdue to flourish.  Last week, I was able to work on something creative everyday and here are two results of my endeavor:
Autumnal Compositae 
I am a trained botanical illustrator.  I got bored with the process and let it go, exploring other forms of expression from collage, to mix media, art quilting and other fiber-textile processes.Yet, because I wanted to get something going - do art for the sake of the process - I reverted to my roots to produce these two portraits (above and below)

White egret
Last weekend, a white egret visited my porch and the neighbor's as well.  It was around all day, squawking and perching and flying off only to return and repeat.  I managed to get a few sketches of it and produced this drawing during the week as well.  I am fascinated by birds and can spend hours watching them, one of my favorites are the egrets and herons.  I think I captured my visitor as if it were a juvenile bird - but he wasn't.  Interestingly, I see it has returned this morning, so I hope to make more sketches so that I can improve on its portrait.  

The process of painting on a black ground is interesting.  I used a bristol or card stock with a tooth to it.  I sketched it in pencils first then laid in a layer of white gouache - watered down a bit.  This is the white to grayish back ground to use the colored pencils.  The bird I just used white prismacolor pencils directly on the paper.  

I forgot how much I can get happily lost in the process of drawing...how much more calm and intuitive I feel when I am working on a piece.  Living a creative life is my passion and purpose to celebrate my talents and share them with others.

My quote for the weekend:
“When we engage in what we are naturally suited to do, our work takes on the quality of play and it is play that stimulates creativity.” –  Linda Naiman

Sunday, November 3, 2013

Sunday Musings - Autumn has arrived

Autumn has arrived with the switch to daylight savings time.  The days are golden and tepid, the nights inky and chilly. In anticipation of the coming holidays I have built up a generous head of steam for all the projects that come with the annual celebrations of autumn and winter.  

It has been a long time since I submerged myself into holiday inspired projects.  In fact, tit has been 10 years or more since I bought a pumpkin and carved it.  Yes, very sad indeed. My little effort was fun even if the result was not particularly the best carving to behold.  I am proud of the fact that I plunged in and did it.  So many childhood memories were flooding the kitchen as cider warmed on the stove, I watched a rerun of a favorite PBS mystery and carved away.  I had fun with it, and I plan to try again in the following year. 


My plan was to carve it so that the semi-transparent skin glowed from within when lighted from the inside.  I was somewhat successful.  The outcome from the experience was I relearned the process.  I know what tools I need to get to a better job next time.  I also figured out that to get more delicate carvings I may have to take away the flesh from in the inside first, then carve the skin.  Because I didn't have the 'pumpkin' carving tools available on the market I used linoleum block cutters.  Thus with the limited blades that I had, the process was labor intensive and not very flexible.  Nonetheless, I had a fabulous time and this process rekindled my enjoyment of preparing for All Hallows Eve.

Recently, I have been watching crows and ravens in all their antics in flight and cawing from various points of view.  I am fascinated by these intelligent birds. They are feathered thrill seekers with an abundance of curiosity and mischief.  I am often sketching them and decided to attempt a pastel drawing with a background of glazing.  Here is the result:

I loosely sketched in the figure with hard pastels, built up the body and texture after spraying with workable fixative.  Then I applied a glazing using Ivory, burnt sienna and mustard yellow around the figure - again, not trying to be perfect.  I think I captured the quick and spirited curiosity that is always in their eyes.  What do you think?

Autumn, after a hot summer, gets me in the mood for cooking more.  Salads are the meal du jour during the summer so I don't have to heat up the house with the oven or the stove top.  During the fall the energy and spark to cook returns.  I recently put together a small dinner for my parents which entailed: Baked grits, lemon lavender chicken and a pear salad.  
Boil grits per instructions on the box.  Mix grits with, salt/pepper to taste and sprinkle in your favorite herbs,  1 egg, milk (enough to make it into thick batter. Grease a ceramic pan, pour in and cook till the point of knife comes up clean and slightly brown on top.  350 degrees F works.

I used a recipe in The Little Paris Kitchen by Rachel Khoo.  Mainly its marinating your chicken in honey, lavender and lemon.  Yummy!
A simple green salad with sliced pears, gorgonzola cheese, dried cranberries and sliced green onions. I used a balsamic vinegar dressing.

Crafts, art and food are what this season is about for me.  As I develop this blog I hope to feature regular posts on food that is healthy, easy to prepare and also appealing for the season.  Additionally, my plan is to regular post on my different craft projects as well as my journey in art.  Are the two separate?  Art and Crafting?  Yes and no - at least to me they are realms that blend and blur into each other.  However, for the purpose of this blog I will separate them.  Crafts will focus on D.I.Y. projects that are seasonally inspired and also helpful for just creating a useful things.  A journey in Art will be sharing my exploration into artistic techniques for producing works of art that interpret my view of the natural world.

Again, welcome to Serenplicity Studios.  I didn't get this off the ground by October 1st but here it is November and I am launching this special haven of creativity that I hope you will bookmark and return to as often as you can.  Please join me!


Sunday, September 15, 2013

Welcome to Serenplicity Studios

We are not yet open to view yet but hope to be before too long. Please bookmark us and come back by the 1st of October 2013!